Connect Your Substack to Google Analytics for Tracking
How to set up Google Analytics for your Substack publication so you can track your traffic.
I recently set up Google Analytics (GA4) for my Substack publication so I can get better insight on visitors, subscribers, and readers.
Since I’ve done this type of thing many times for my day job, I thought a walk through of what I did might be helpful.
What benefit does this have? Tracking, of course.
We all know by now, if you are posting links to your Substack on any other site (social media sites, guest posts, newsletter collaborations, Medium, etc.), you should have a way to track them.
More broadly, if you want to know where your traffic and subscribers are coming from and what they do once they arrive, this is how.
Let’s do a quick run-through on how to set up Google Analytics 4 for your Substack publication. I’ll use my Substack as an example.
I’ll also touch on Urchin Tracking Module (UTM) code and UTM links for better tracking from guest blog posts, newsletter collaborations, and social sites.
When we’re done, you’ll have more insight into your visitors and readers.
GA4 has its haters and it’s far from perfect. I'm choosing GA because a) it's free, and 2), it integrates easily with Substack.
This may seem technical, but if you can post to your Substack, you can do this.
Here we go:
Set Up Google Analytics
Prerequisite:
To do this, there are two things we need besides a Substack publication:
A google account
A Google Analytics account
You can't have a Google Analytics account without a Google account. You can use an existing Google account if you like (I did).
Need to create a Google account?
Once you have a Google account, sign in and go to analytics.google.com.
What you’ll see next depends on whether you already have a Google Analytics account (you won’t, if your Google account is brand new),
If you have an existing Google Analytics account
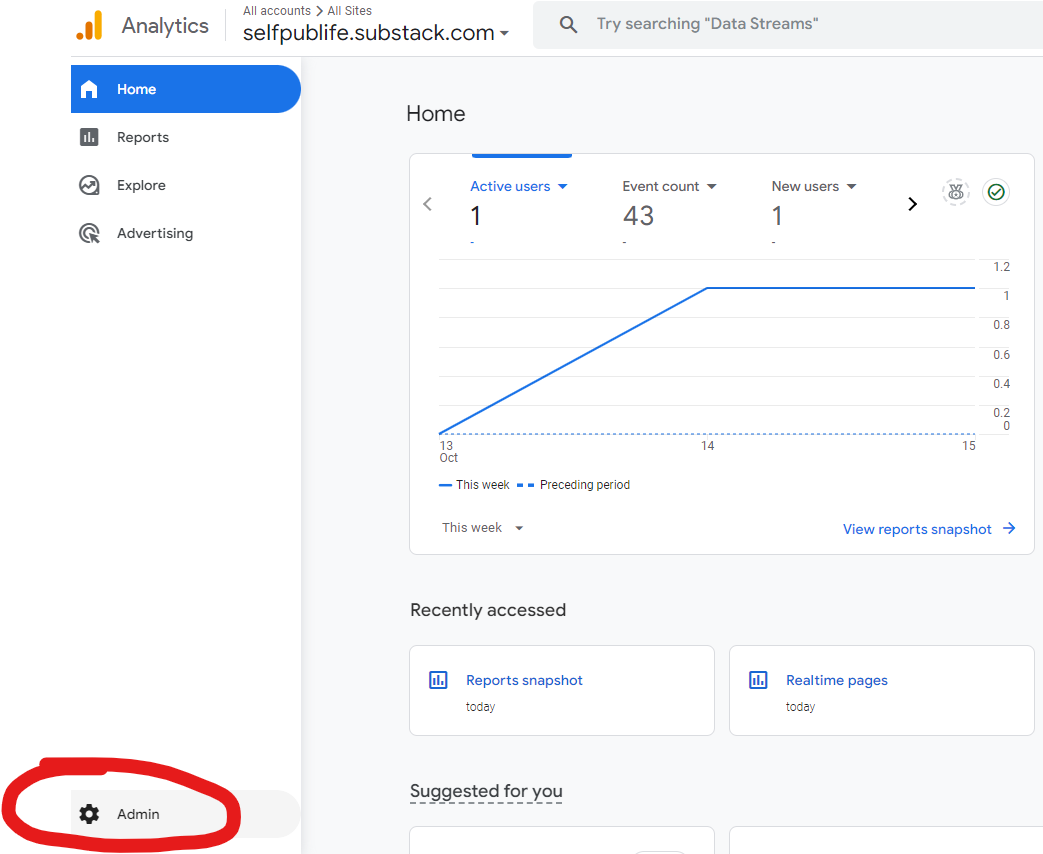
Once in your GA account, to get started, click “Admin” in the lower left of the screen (the gear icon).
You can either set up a new GA account or a new property.
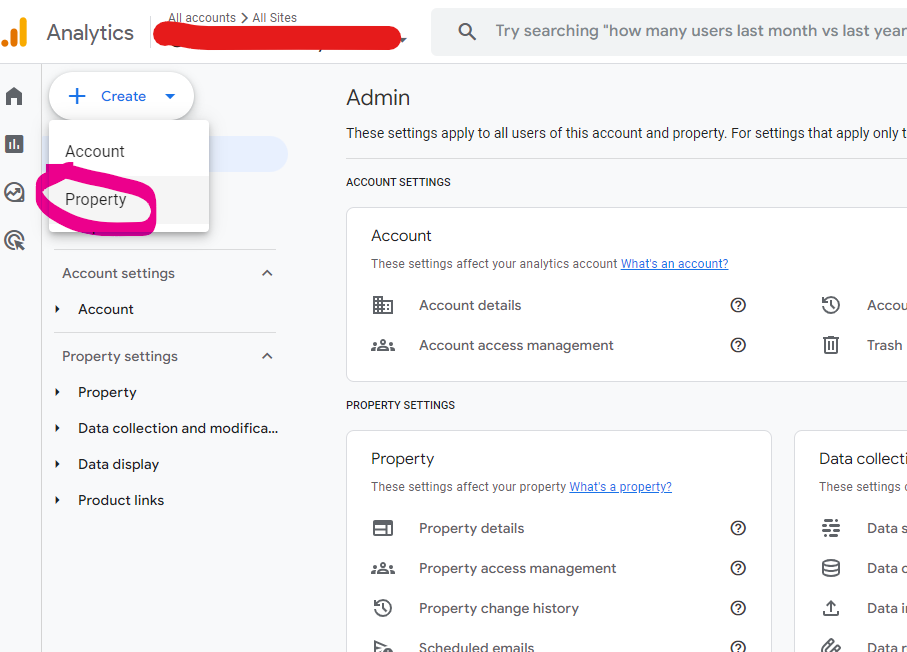
In my case, I’ll create a new Google Analytics property in a GA account I already have. To do that, I click on “Create > Property”.
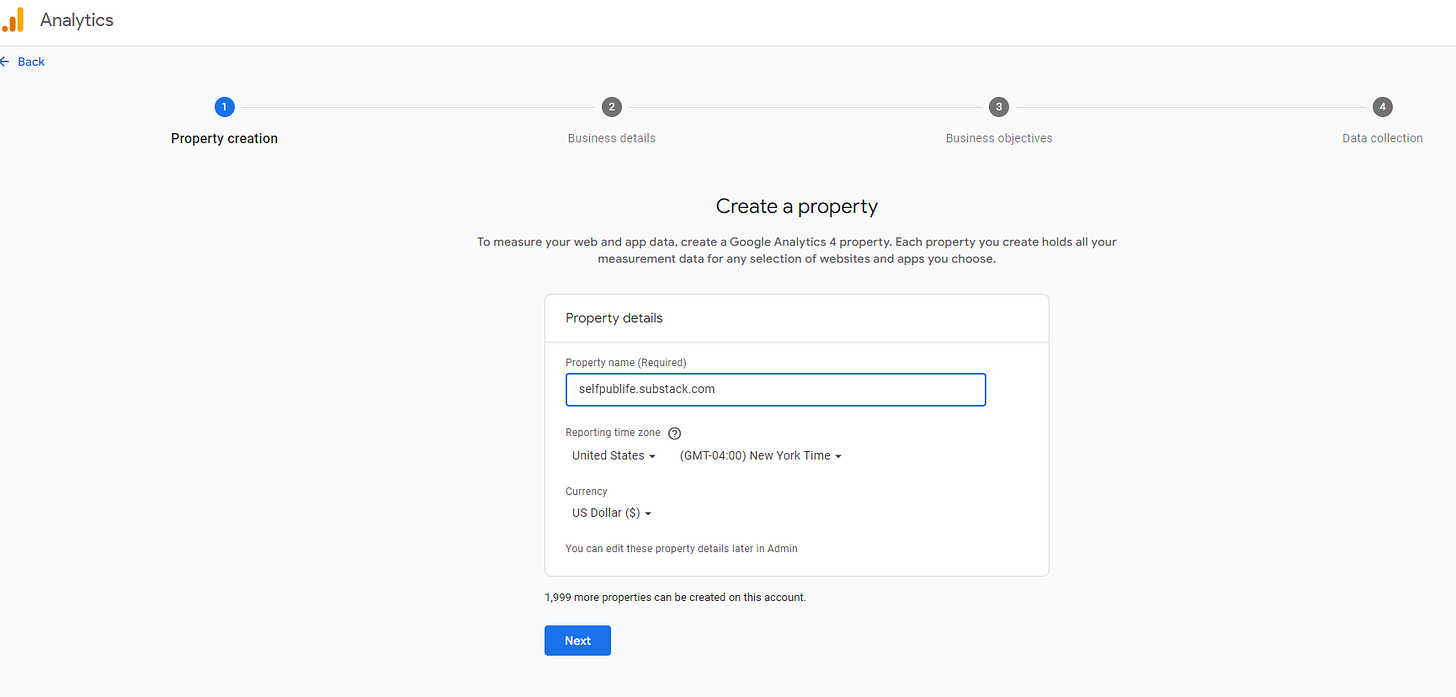
That takes me to this screen (Create property):
I used my Substack’s URL for the name of the property, but you can be creative. Select your time zone and currency.
On the other hand…
If you don’t have a Google Analytics account
You may see a welcome screen like this with an option to “Start measuring”.
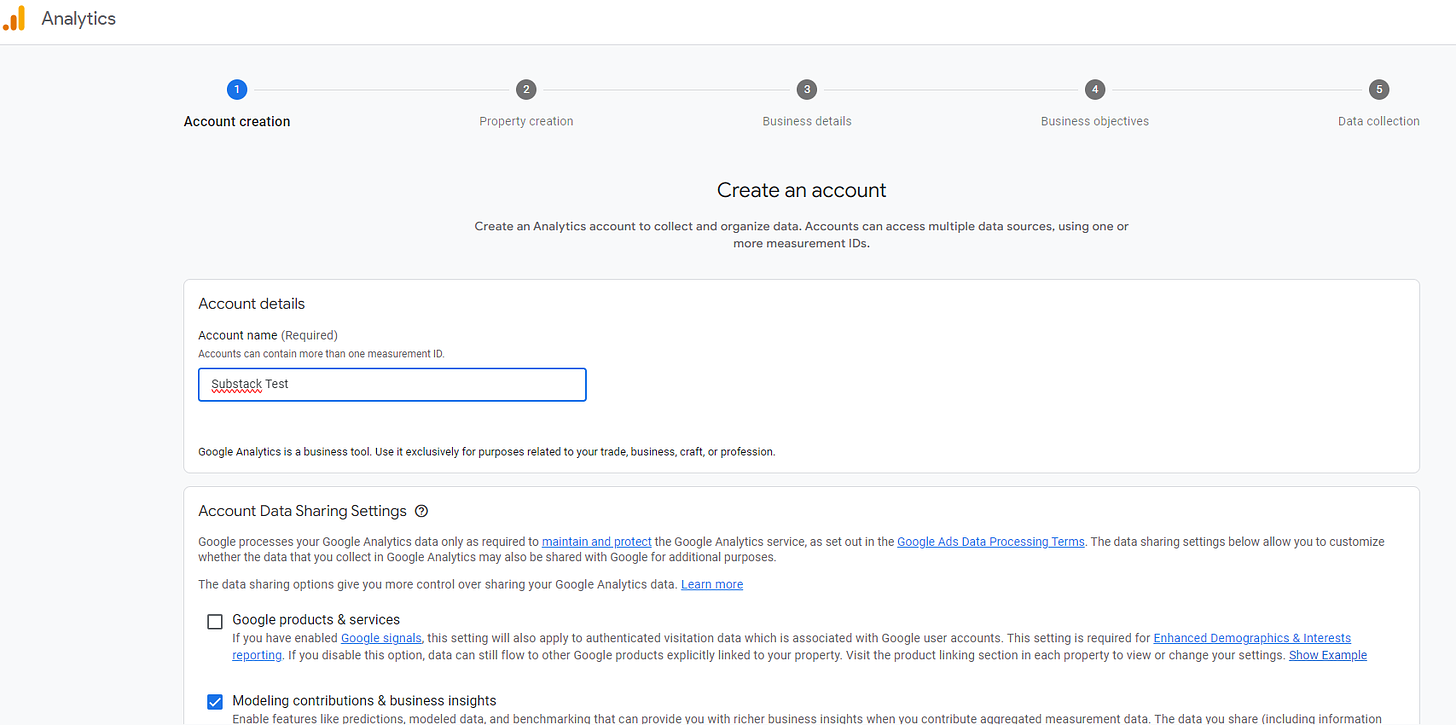
After clicking the “Start measuring” button, you’ll hit the “Create an account” screen and will walk through the initial Analytics account creation and then onto the GA property creation.
Most of the information they ask either doesn’t matter or can be changed later (such as what kind of reports you want).
Choose a name for the Analytics account that makes sense to you and click “Next” to go to the “Create a property” screen.
The rest of the set up should be the same for either pre-existing or new GA accounts.
Choose a name for the property (I used my Substack’s URL, but you can be creative) and select your time zone and currency. Click “Next” to go to “Describe your business”.
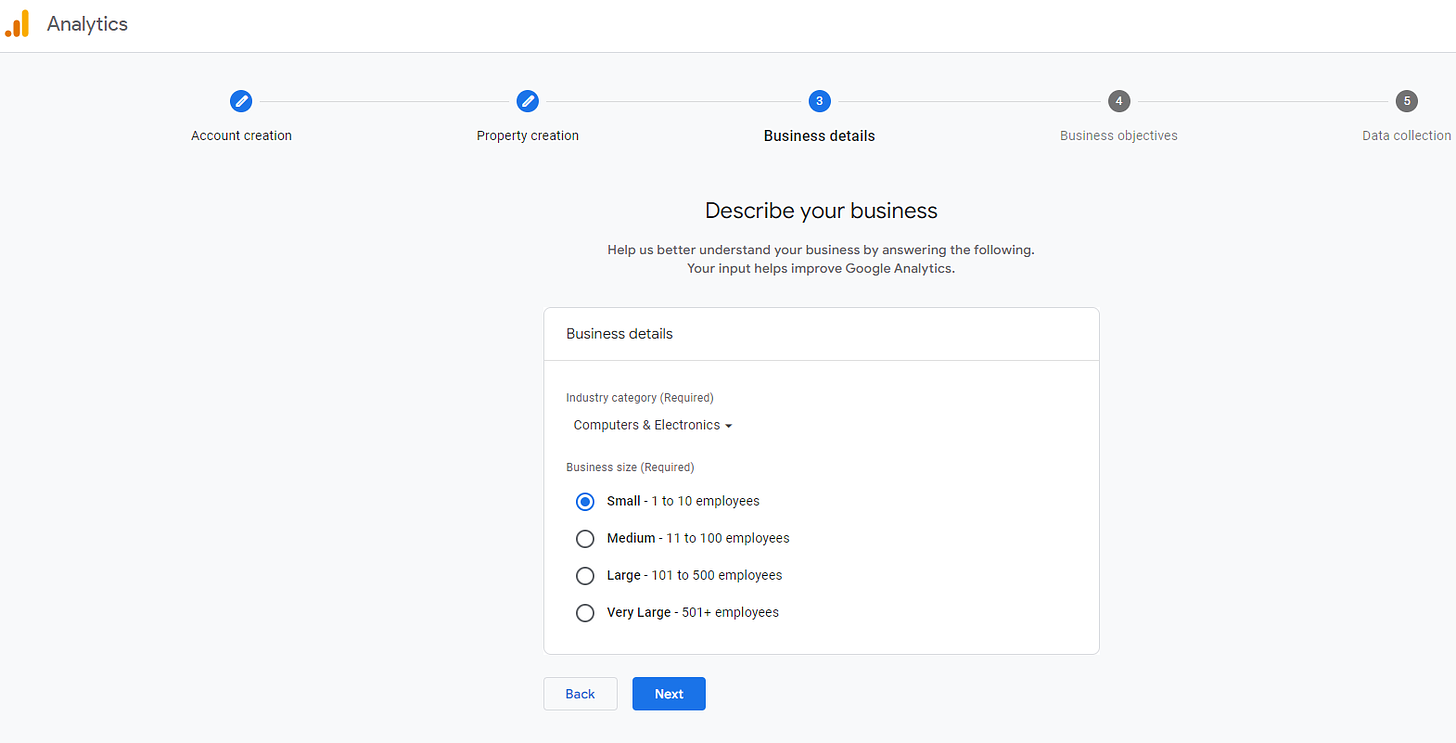
Select industry category (pick one that’s close or choose other) and size of company. Click “Next” to go to “Choose your business objectives”.
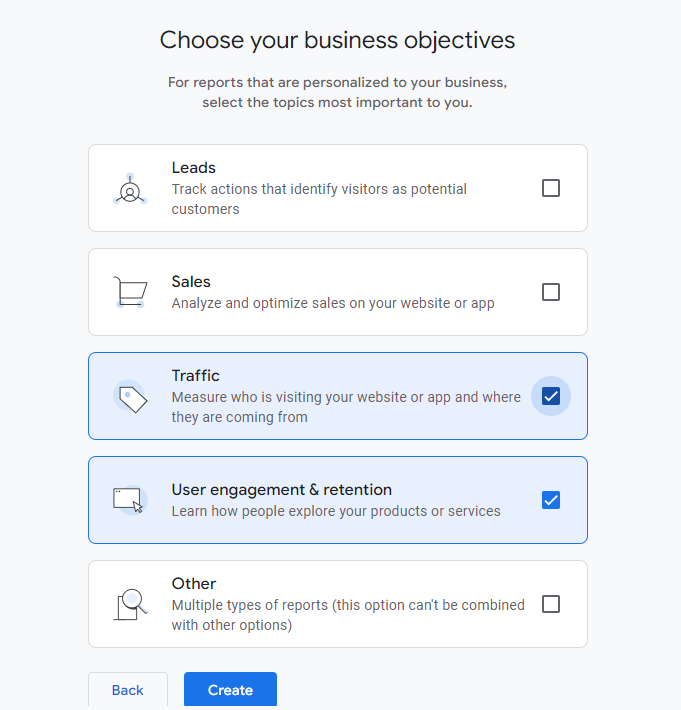
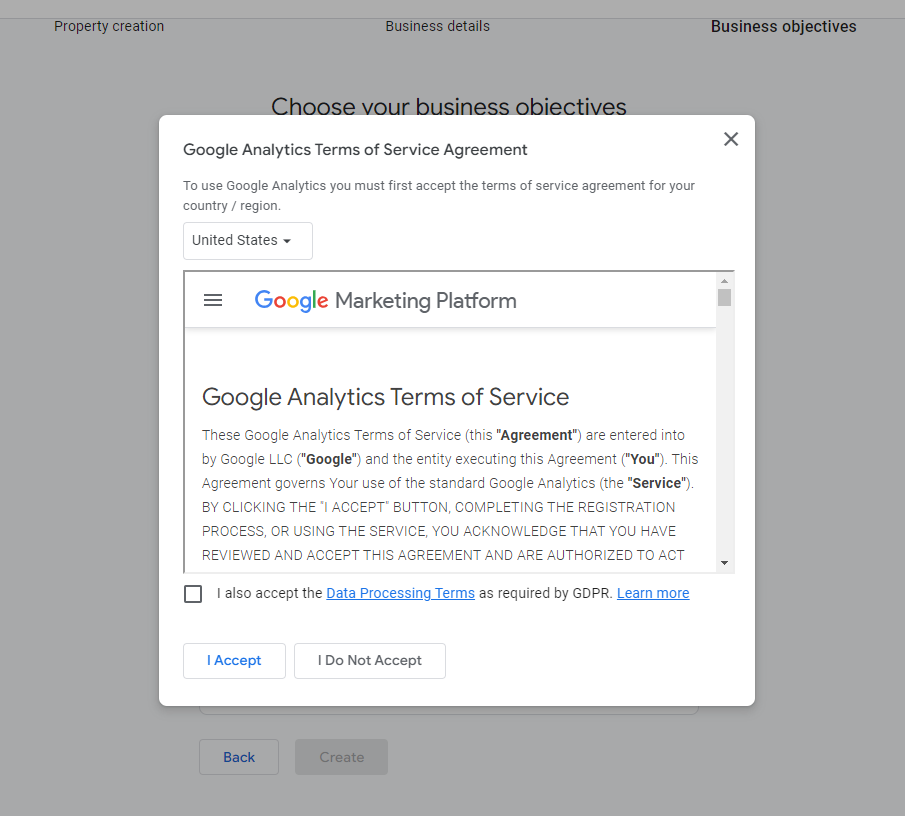
Chose your objectives. I chose traffic and engagement/retention. Then click “Create” and the ToS page appears.
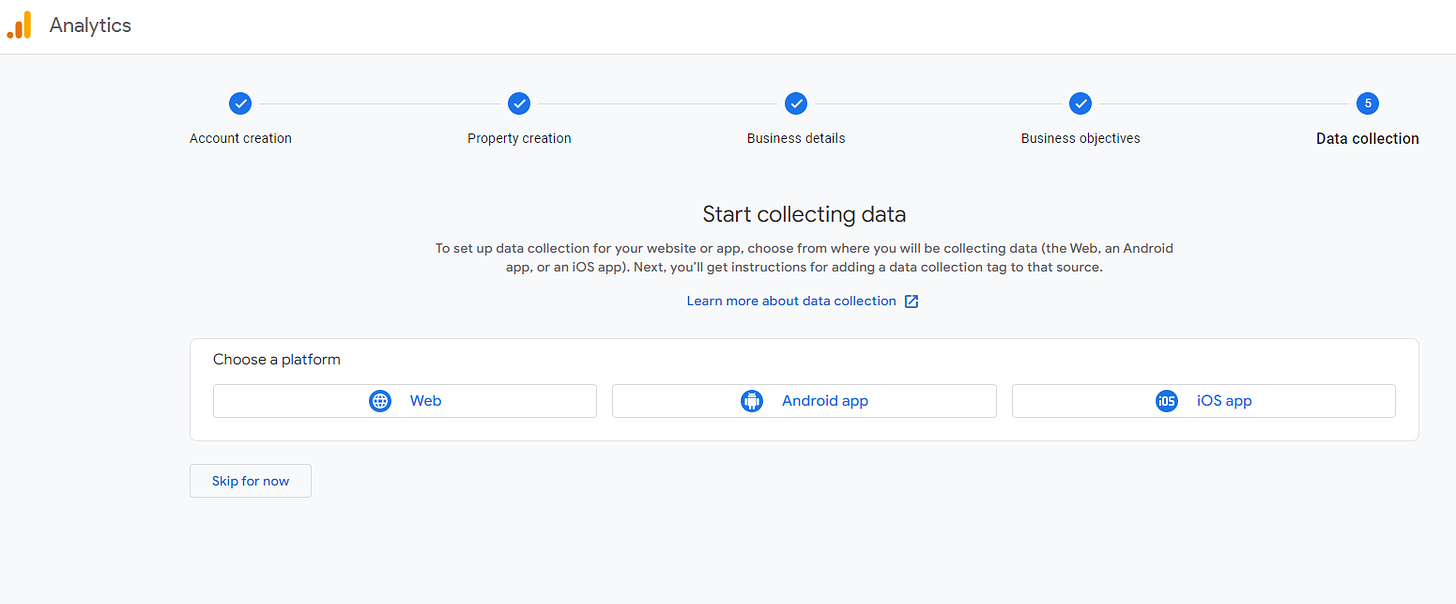
Accept the Terms of Service and that will take you to the data stream creation page (“Start collecting data”).
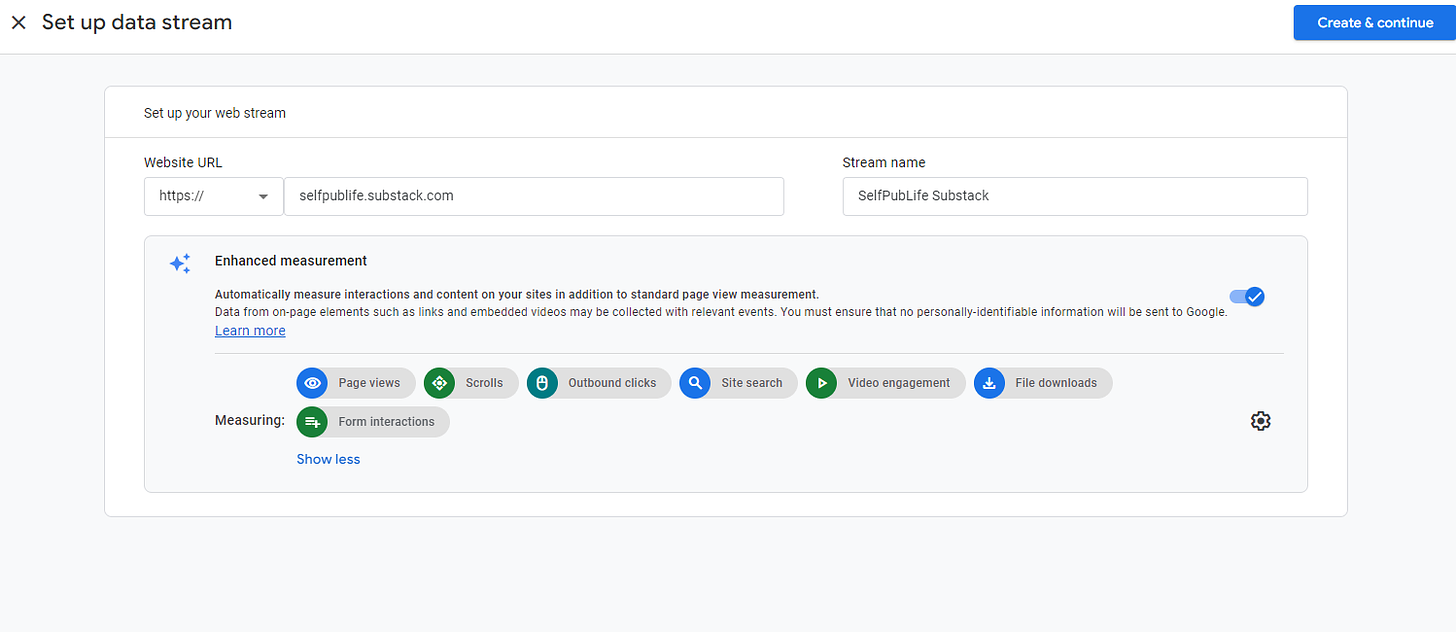
Choose “Web” for the platform and that will take you to “Set up data stream”.
Under website URL, I entered the URL for my Substack (if you’re using a custom domain, enter that instead). For the stream name, you can be creative. Click “Create & continue”.
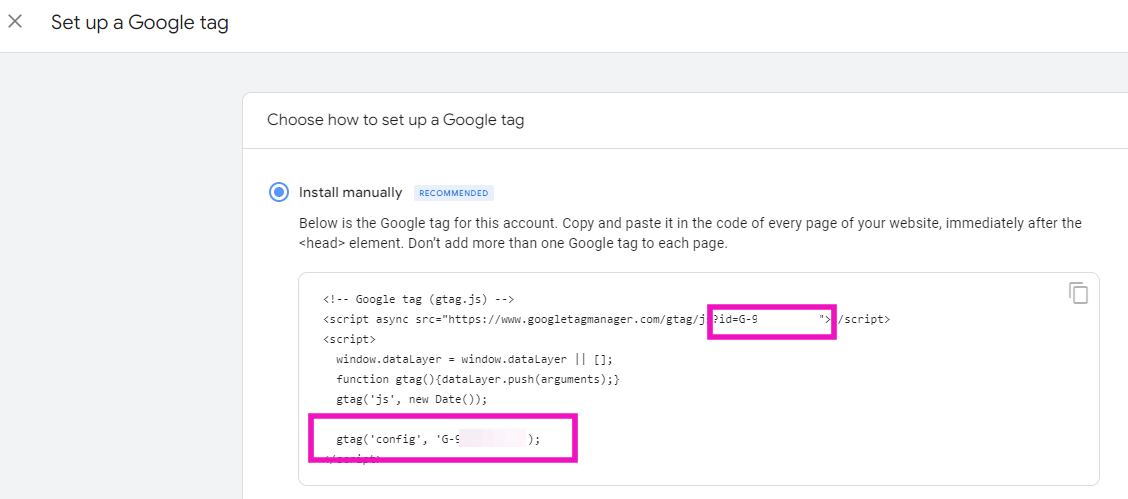
Ignore the instructions on the following page (“Set up a Google tag”). As I explain below, we’ll do this a different way for Substack so we don’t need them.
How to copy and paste the Google Analytics Measurement ID into Substack
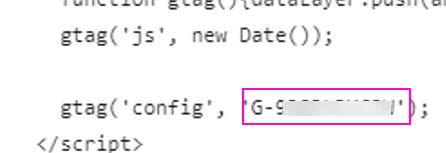
What we need next is what’s called the Google Analytics Measurement ID, otherwise referred to as the Google tag.
This Google tag is like a driver’s license number for your site. This is how GA4 will track your site's activity.
I’m not showing mine in the images here to eliminate any confusion so that my tag doesn’t end up on a website that can’t use it.
It starts with "G-" followed by numbers and letters in the format of G-XXXXXXXXXX.
Substack has some magic it does with GA so as I mentioned above, we can ignore all the instructions on the “Set up a Google tag” page. We don’t even need to copy the Google tag from here, a method that is prone to error.
Instead, let’s copy the Google tag to the clipboard a more reliable and easy way.
Close the “Set up a Google tag” page.
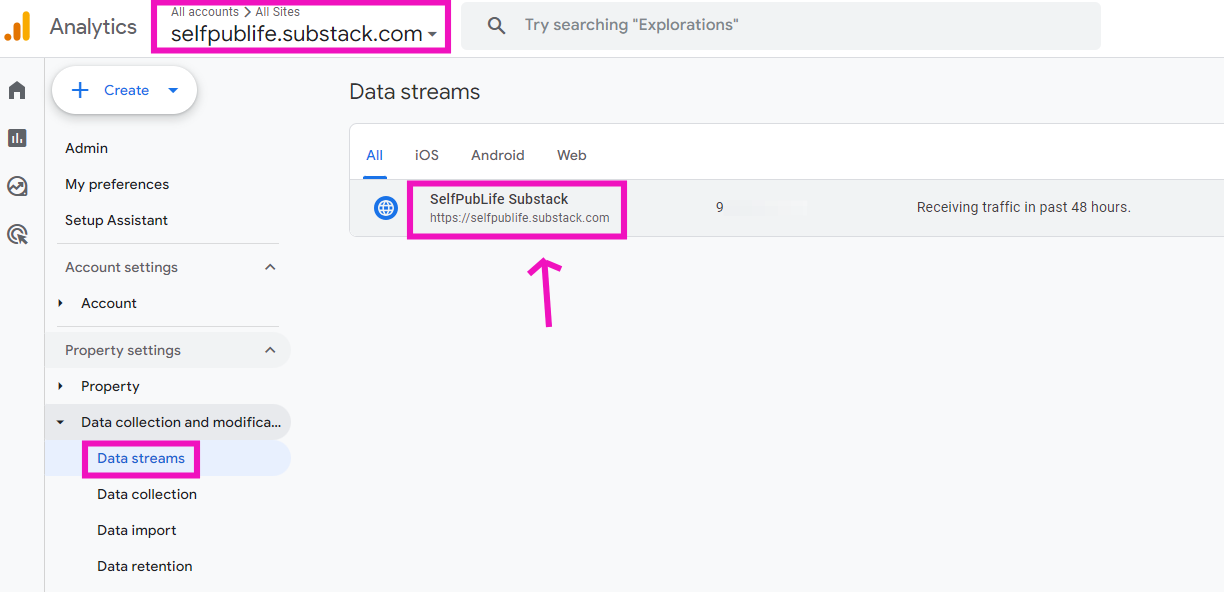
With the correct account selected, click on “Data collection and modification > Data streams”.
Under “Data streams”, click on the name of the data stream.
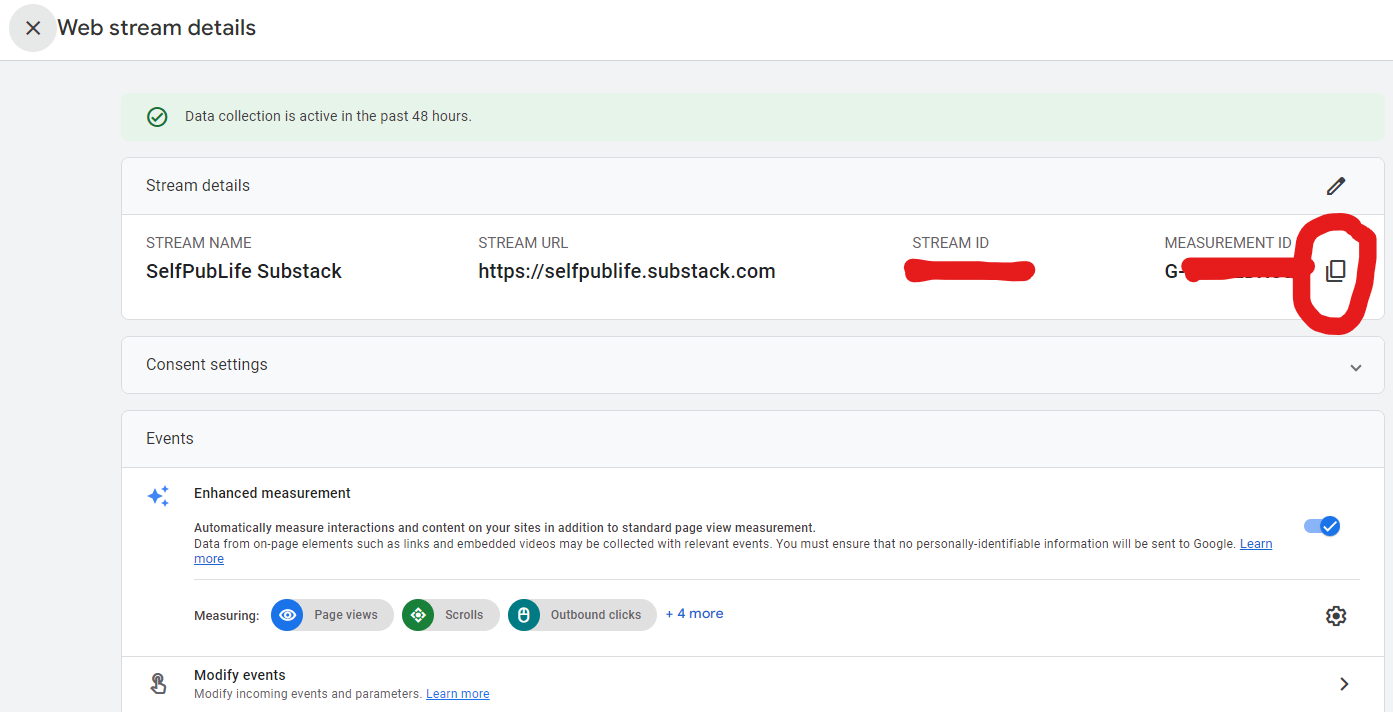
That opens the “Web stream details” page.
Click the copy icon next to the Measurement ID to copy the Google tag to the clipboard.
We’re going to paste it into our settings in Substack.
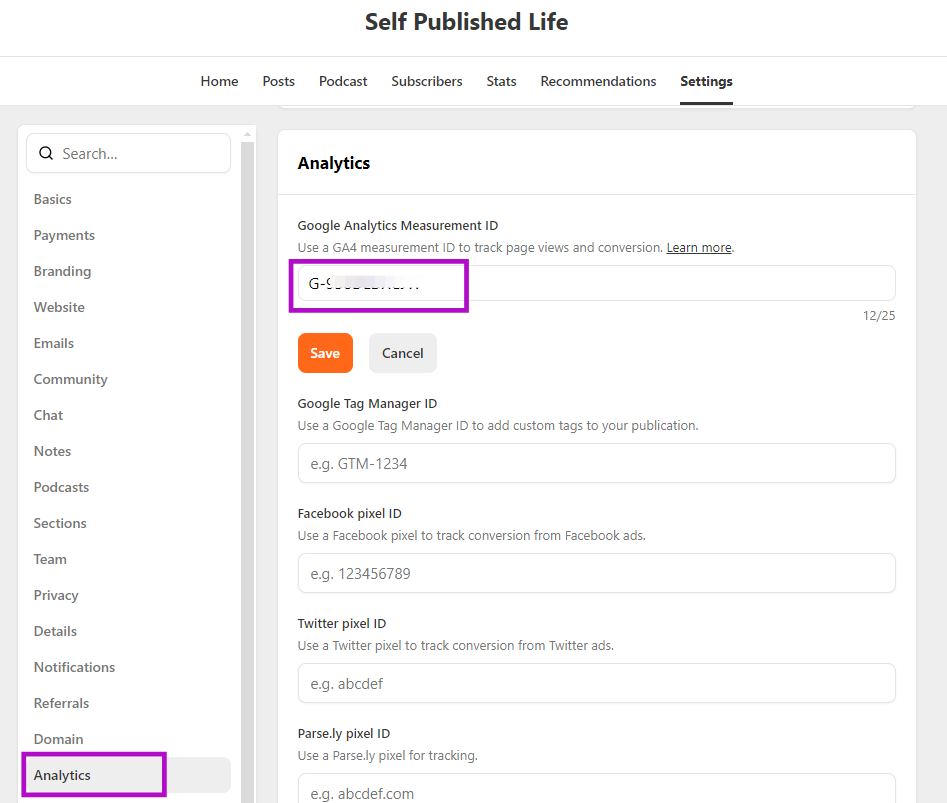
Hop on over to the Substack dashboard and open the settings for your publication (not the settings for your personal profile).
Click the Analytics tab on the left.
Paste the ID you copied to your clipboard in the top box where it says "Google Analytics Measurement ID".
Click the "Save" button.
That's it!
Substack will handle inserting that tag into the relevant code on your site to do the tracking.
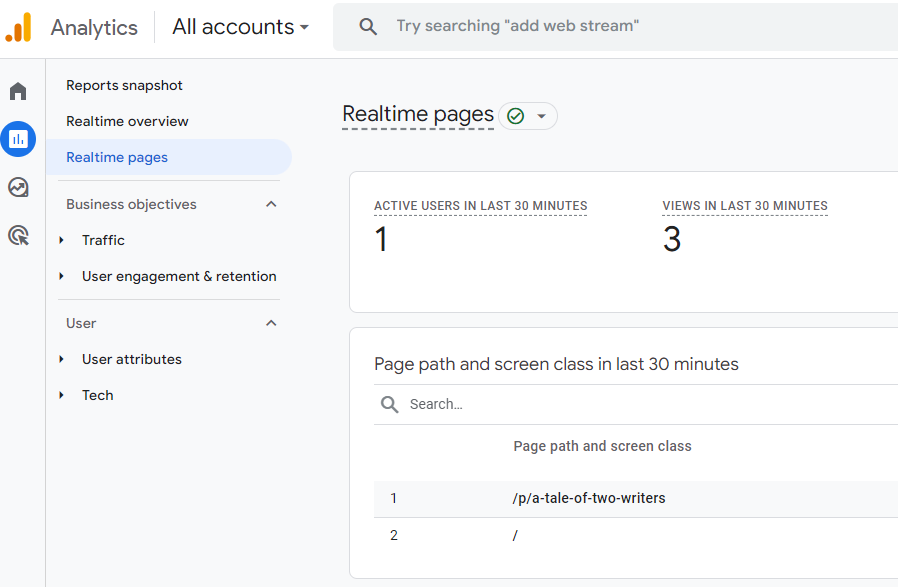
Once the data starts showing up in GA, you’ll see it at analytics.google.com (make sure you log in with the correct account and select the right property).
Here is my “Realtime” data showing up now:
Quirks of GA4
Now that you have GA4 set up, you should know it’s not perfect, no tool is.
These are the things it’s hard to get management to accept. Tools are weird, inaccurate, and all tools lie about something at some point.
It can take a good long minute for the data to show up.
If you don’t see any data in the GA dashboard, either something went wrong, you don’t have any visitors, or you just need to wait for the delay.
Despite the fact that GA provides a real time data view, GA isn’t a meant to be a real time data tool.
Yes, I know. It makes no sense.
Also, what shows up as real time data only stays there for 30 minutes. Those visitors won’t show activity in the non-real time reports until much later, often the next day.
So there’s this frustrating gap. The report can say you’ve had no visitors that day even if you have.
Yes, I know. It makes no sense X 2.
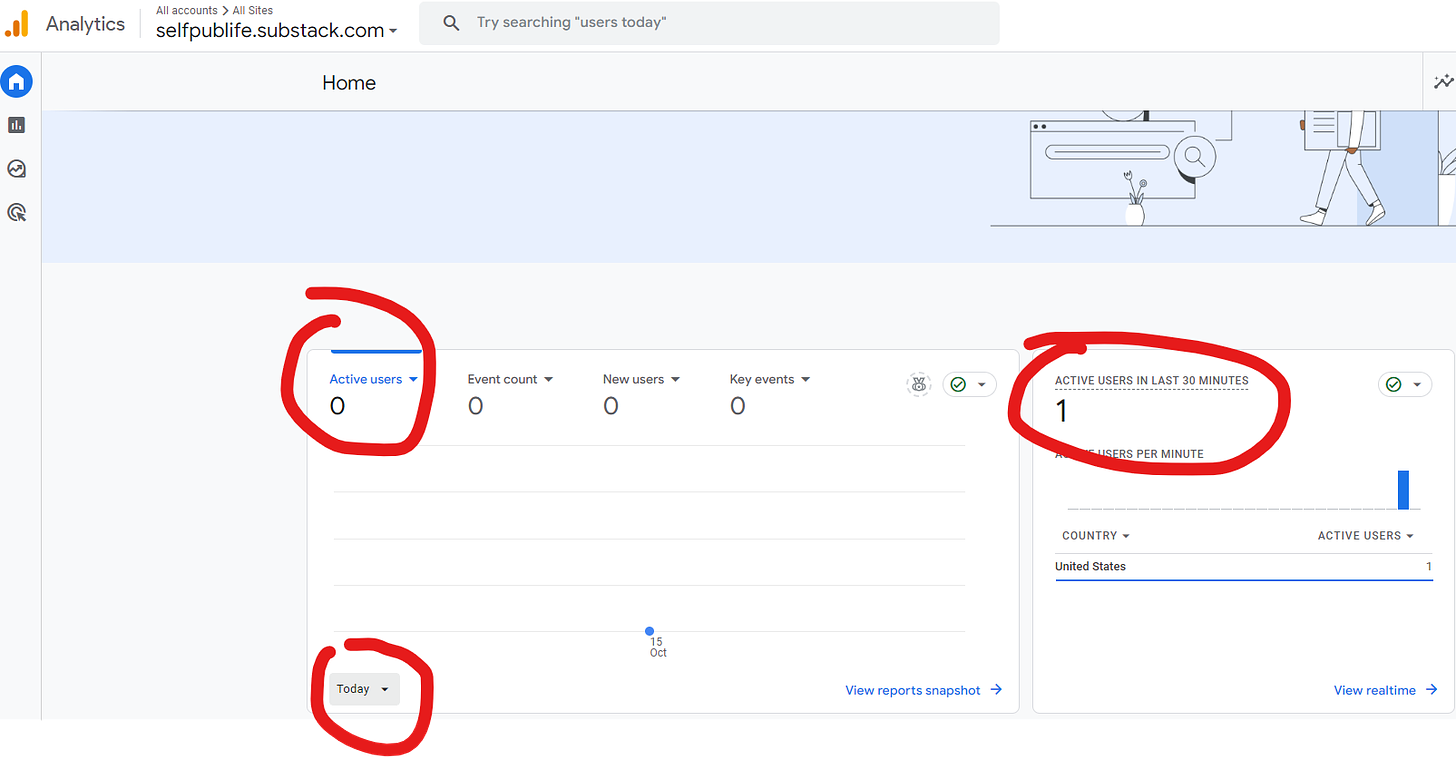
Have a look. The screenshot below is shortly after completing the above process and then visiting my Substack as a reader (to trigger the data).
This is often a little difficult to accept because the screenshot shows no visitors today on the left, but yet 1 visitor (me) in the last 30 minutes on the right. How can that be?
The real time data on the right literally only shows activity within the last 30 minutes or so (if at all). Then it disappears. In my experience, that activity won’t show up on the left until later, often the next day.
That means if we wait 30 minutes, both those numbers could go to zero. Awesome.
Equally awesome is the reality that tracking, in general, is deeply flawed for many reasons I won’t go into here.
Track Traffic Using UTM Links
Still, even with the quirks and flaws…
There are a ton of things you can do with your analytics data and there’s a lot of configuration trickery, enough to fill several books. I’m only going to briefly talk about using UTM links since that is what inspired this post.
What are UTM links?
You’ve likely tapped, clicked on, or copied and pasted a UTM link before. They are in wide use throughout the web.
A UTM link is a link that has UTM parameters added to it.
UTM codes or UTM parameters are snippets of text added to the end of a URL that provide additional information about that URL to GA4 (in this case).
They’re often used in ad campaigns or when linking from one site to another and tracking is needed.
Here’s one I found on CNN linking to Bleacher Report’s college football predictions.
https://bleacherreport.com/articles/10139545-college-football-2024-week-8-predictions-for-every-game?utm_source=cnn.com&utm_medium=referral&utm_campaign=editorial
Everything after the question mark in that link is providing data to the analytics software when the visitor lands on the page. It knows the visitor came from CNN as a referral as part of the editorial campaign.
When you couple GA4 with UTM links, you can better track where your traffic is coming from and which campaigns are effective.
You can also get a better idea of the journey people are taking through your Substack, how many pages they read and which ones, and how long they stick around.
You can use UTM links in ads, in newsletter collaborations, in bio links, and in links from social media, blogs, or articles you write.
The easiest way to format a UTM link like the one above is to use a tool, such as the Campaign URL Builder.
I plan to explore the topic of UTM links a little more in an upcoming post. The bottom line is, use UTM links when you want to know where your traffic is coming from.
For reference: Here is Substack’s guide on how to connect GA4 to your Substack.
Let me know if you have questions regarding connecting Google Analytics to your Substack. Also let me know if you’d like to see more technical walk-throughs.



What a valuable read! I also set up Google Analytics for my Substack on my custom domain, and I'm glad that I took the time to do so. And thanks for including the "quirks" and details about UTM parameters as well. This is a great how-to article that you've done very well with. I consider this to be a wonderful resource for anyone trying to learn the setup of Google Analytics for their publication.